Resources
The TeamDesk Resources section provides you with the functionality of an online repository. This feature allows you to upload and store various files on the TeamDesk server, ranging from database-related documents to client-side scripts or landing web pages. Database resources can be made available to database users only or to any web user.
Adding New Resources
To upload resources to the TeamDesk server:
-
Click the
Setuplink in the top right corner of the window. -
Select the
Databasetab. -
Choose
Database>Resourcesfrom the setup menu. -
At the top of the resources list, click the
Newbutton and specify the resource properties:- Click the
Choose filebutton to specify the path to the necessary file on your computer. - When choosing files, you can select more than one. If you select a single ZIP archive, there’s an option to unpack it and use its contents as individual files, retaining the archive’s folder structure if present. To do that, check the
Unpack ZIP archivebox. Alternatively, by not checking the box, you can upload the archive intact. - Use the
Upload tobox to specify the folder where the file(s) should go—either choose from existing folders or type the name of a new one. - In the
Resource exists?setting, you can select one of the following options:- Leave the original resource untouched.
- Overwrite with a new file.
- Add notes to the
Notesfield if needed. - If the file should be accessible to any web user, select the
Allow public access to this resourcecheckbox.

- Click the
-
When you’re finished, click
Save. You can access the newly created resource by clicking the resource name link (the path to the resource will be available in the browser address bar).
The disk space allocated for resources on the TeamDesk server is unlimited. However, the size of a single file should not exceed 100 MB.
Working with Existing Resources
To manage existing database resources:
-
Click the
Setuplink in the top right corner of the window. -
Select the
Databasetab. -
Choose
Database>Resourcesfrom the setup menu. The system will display a list of previously added resources:
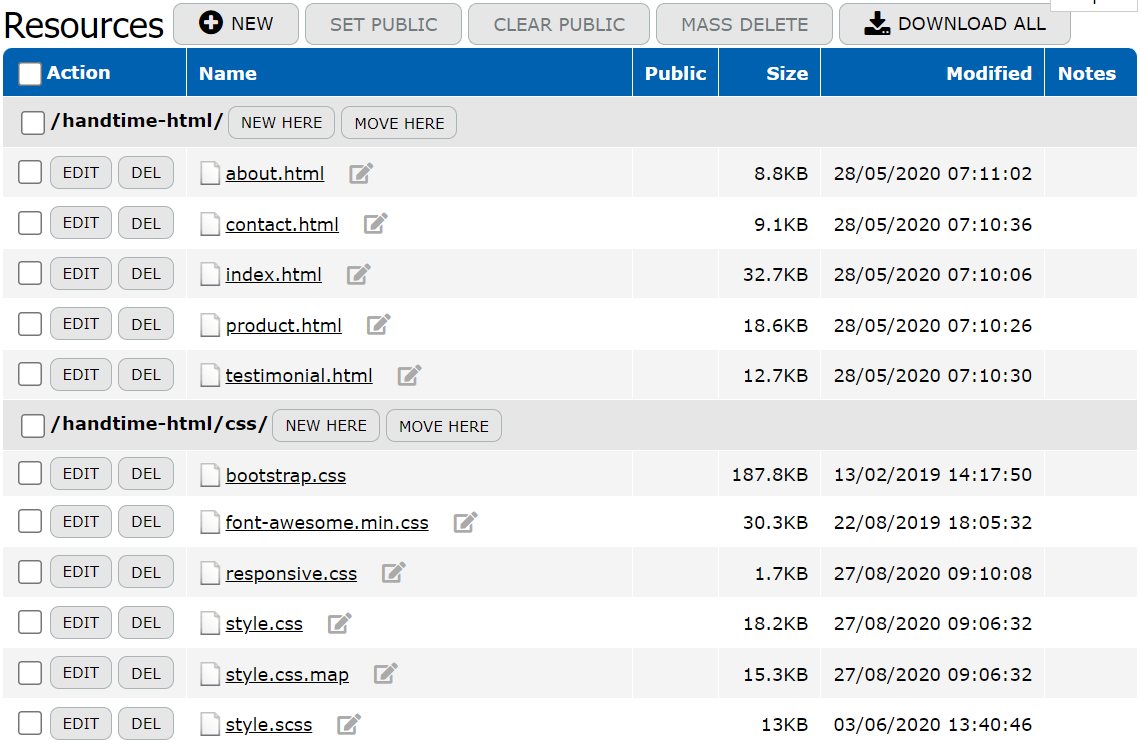
The following actions are available for resources:
- New: Click
Newto add a new Resource element. - Set Public: To allow public access to an existing resource element, select the checkbox next to the element and click the
Set Publicbutton. To apply this action to all resources, check theActioncheckbox. - Clear Public: To revoke public access to an existing resource element, select the checkbox next to the element and click the
Clear Publicbutton. To apply this action to all resources, check theActioncheckbox. - Mass Delete: To delete multiple resources at once, check the checkboxes next to the resources you want to delete and click the
Mass Deletebutton. To delete all resources, check theActioncheckbox. - Download All: Use the
Download Allbutton to download all files stored in theResourcessection. This will create a folder containing the files on your computer. - New Here: To add a new file to the selected folder.
- Move Here: Select the file by checking the checkbox and click the
Move Herebutton next to the destination folder, to which the file should be moved. - Edit: Click
Editnext to a resource in the list to modify its properties. - Del: Click
Delto delete a resource from the list. Confirm your intention by clickingOKin the opened dialog box. - Name link: Click the resource name link to access the uploaded document or file.
If you click on the edit icon next to the file name, the editor form will open where you can modify the file content. The following file formats are editable: txt, js, css, html, xml, svg.
