Managing Existing Users
To modify roles of existing users or give additional rights:
-
Click the
Setuplink in the top right corner of the window. -
Select the
Databasetab. -
Under
Sharing / RolesclickManage existing users sharesin the setup menu. The system will display a list of users:

-
Choose a user from the list and click
Editin a corresponding list row to modify user’s role and additional rights. The following form will appear:
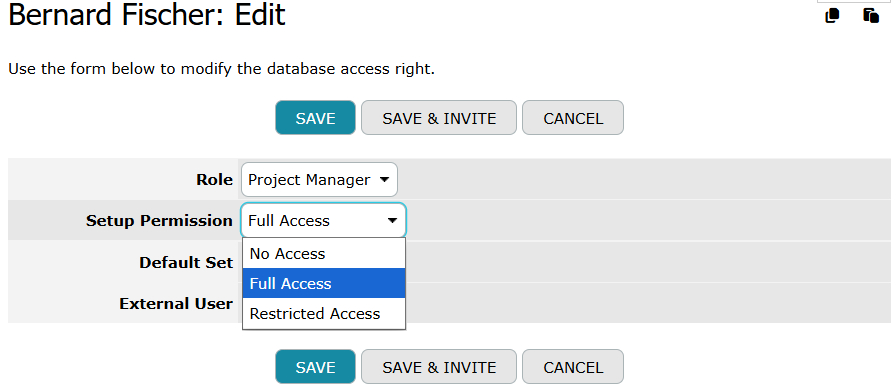
- Role
- From the Role drop-down list, select a user role.
- Setup Permission
- From the Setup Permission list, select the necessary level of access for a user. Available options listed in Administrative Rights.
- Default Set
- Select the
Default Setcheckbox to add the user to the default user set (this set is used as an option list for the columns of the User Type). - External User
- An external user is a person who is not an employee or similar personnel of your company or its affiliates, and is not someone to whom you provide hosted services. Activate this checkbox if an invited person is an external user. The External User option is accessible if the External Users pack is included in your database.
When finished, click Save to apply changes; click Save and Invite to send an invitation e-mail to the user. Click Cancel to discard changes.
Database administrators cannot edit other users’ personal properties such as name, email, or password unless they are using the Enterprise Edition. In the Enterprise Edition, these properties can be managed via the Manage Users screen by clicking on the
All Userstab on theMy TeamDeskpage.For Team and Starter Editions, each user is responsible for editing their own personal preferences. Users can do this by clicking the
Edit Preferenceslink in the dropdown menu, accessible by clicking their profile name in the top-right corner.
To delete a user, click the Del button in the necessary row of the users list. In the displayed dialog box, choose OK to confirm deletion.
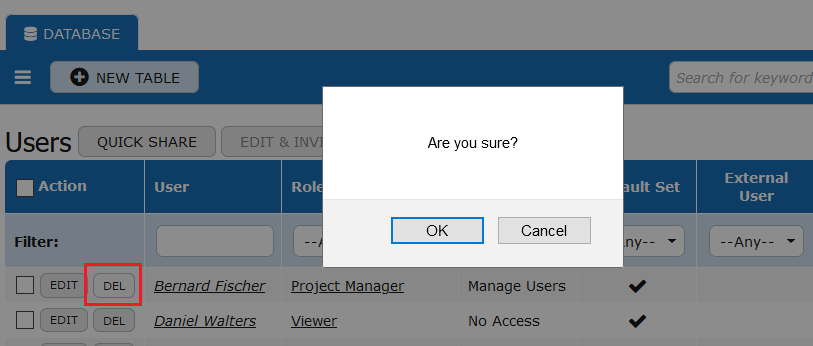
When a user is deleted from the database, you simply revoke the database access permission for that user. The user account is not deleted, and all records are still referred to that user.
In addition, there are filters at the top of the user list. You can enter words or some letters into the User field to find corresponding users. Also, you can filter users by Role, Setup Permission, Default Set, External User, and Last Accessed dropdowns.

To edit and/or invite many (or all) users from the list at once, tick the checkboxes near corresponding users (or the Action checkbox) and click the Edit and Invite button at the top of the list.

After that, use the displayed form to set user roles, define setup permission, include users in the default set or not. You can activate the external user option in case the external user pack is included in your database. Also, the Invite option allows sending invitation e-mails to the chosen users.

When finished, click Save to apply changes or click Cancel to discard changes.
The Quick Share button allows adding and inviting new users to the database.
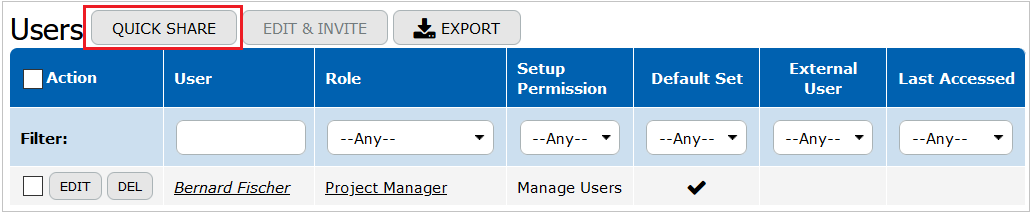
After clicking the button, the Quick Share form will be opened. To add many users at a time, enter their e-mails into the E-mail addresses field.

Click Save if you simply want to add users to the system. Click Save and Invite if you want to add users to the system and send them invitation e-mails (e-mails with temporary invitation link will be sent to the specified e-mail addresses) after which the users will be able to register in the system. Click Cancel to discard changes.
In addition, there is the Export button at the top of the list of users. This button allows exporting all listed user names and options to a CSV file.

Moreover, you can apply filters to display a list of users you need and then export this data to a CSV file.
If there are more than 50 users in the database, and the "User" column is specified in a filter of a database object (view, trigger, button, document, etc.) or in email notification settings (for example, in the "To" field), you should enter some letters or words to find the user you need. By default, the first 50 names of users are listed in the dropdown.